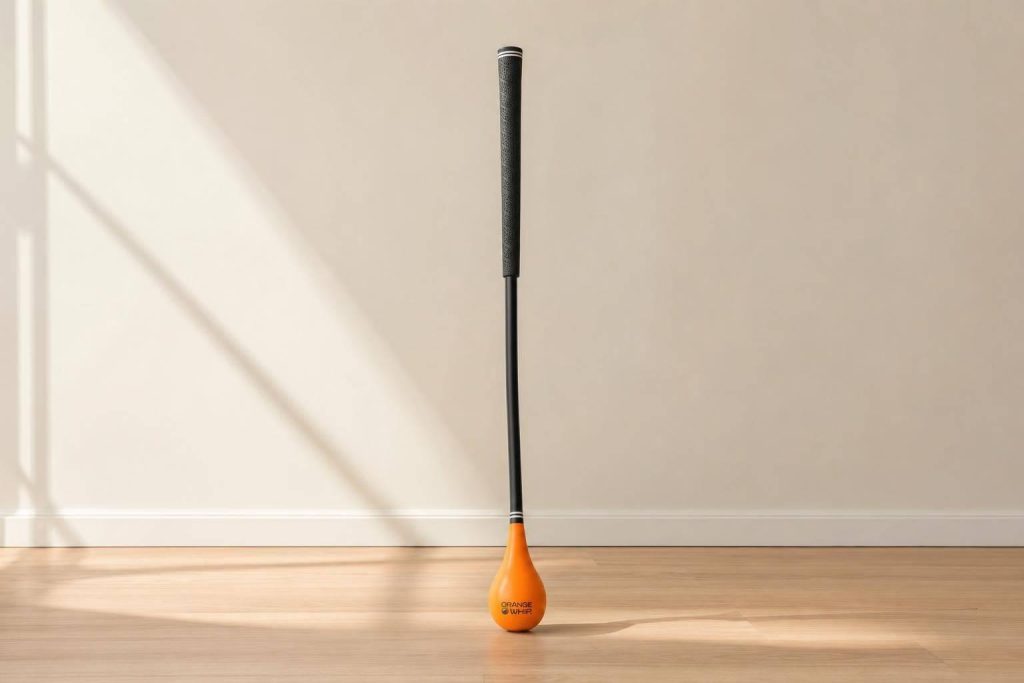
Most beginners do not need more swing thoughts. They need the right feedback. If your setup is off, start with alignment sticks for $10–$20. If your grip leaves the face open, use a grip trainer for $15–$30. If tempo, path, contact, or distance is the issue, the right tool can show it fast without wasting a whole range session.
Here’s the short version:
- Alignment sticks help fix aim and setup
- Grip trainers help fix hand position and clubface control
- Swing tempo trainers help slow a rushed transition
- Swing plane trainers help fix an over-the-top path
- Impact bags help improve strike and shaft lean
- Swing analyzer apps let you see posture and motion on video
- Launch monitors show distance, ball speed, and smash factor
A few numbers stand out:
- Many beginners misjudge carry distance by 10–15 yards
- Good tempo is often close to a 3:1 backswing-to-downswing ratio
- Beginner launch monitors usually cost $200–$600
- The lowest-cost tools on this list start at just $10
The Only Training Aids Beginner Golfers Need
sbb-itb-bcd8bdd
Quick Comparison
| Tool | Best for | Price | Feedback |
|---|---|---|---|
| Alignment Sticks | Aim, stance, setup | $10–$20 | Visual |
| Grip Trainer | Grip and face control | $15–$30 | Tactile |
| Swing Tempo Trainer | Rhythm and transition | $100–$150 | Audio / feel / data |
| Swing Plane Trainer | Club path | $100–$200 | Visual / sensor |
| Impact Bag | Strike quality | $25–$50 | Tactile |
| Swing Analyzer App | Posture and mechanics | Free–$50/month | Video |
| Launch Monitor | Carry distance and ball flight | $200–$600 | Data / voice |
If I had to sum it up in one line, it’s this: match the tool to your main miss, keep practice simple, and work on one problem at a time.
Quick Comparison of the 7 Best Swing Tools
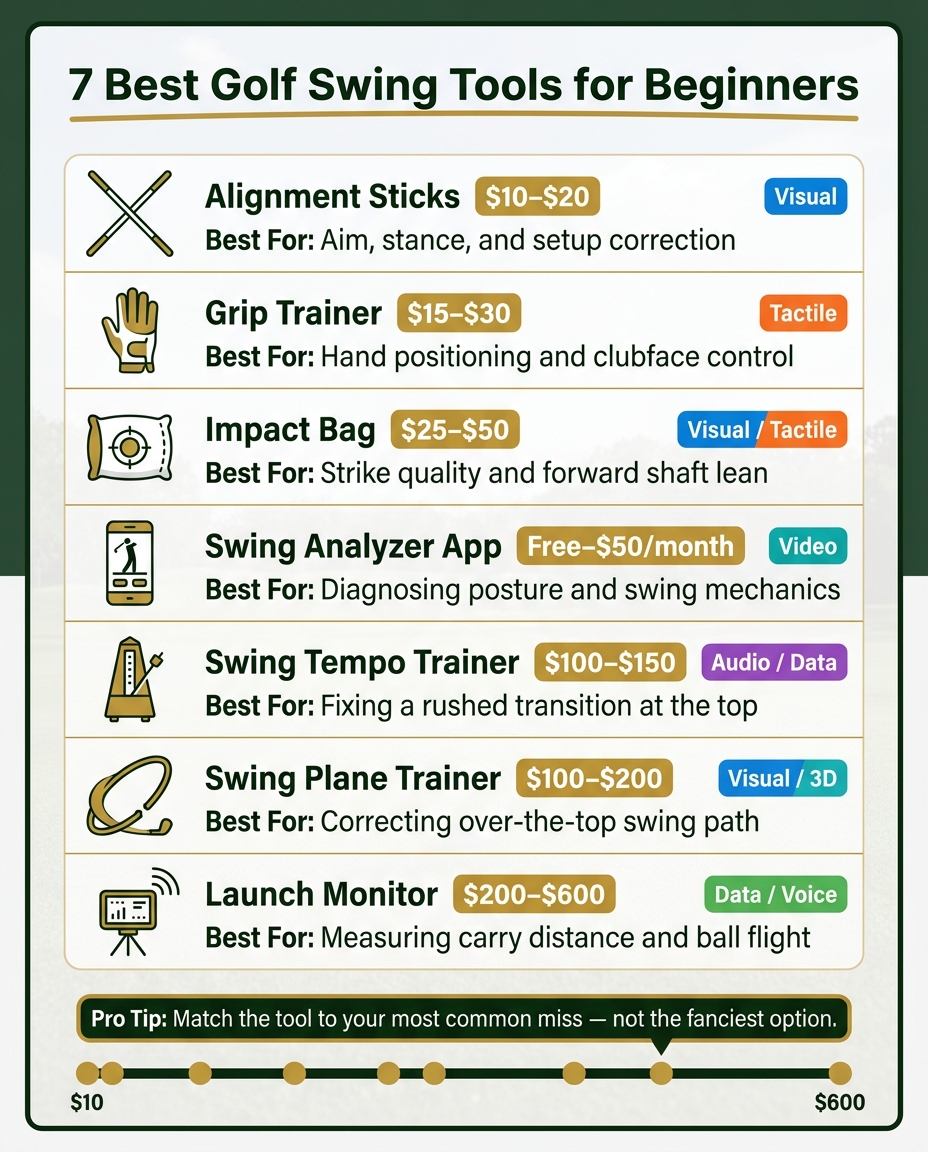
7 Best Golf Swing Tools for Beginners: Price, Feedback & Use Case
Use this table to line up each tool with the swing issue that trips you up most often.
| Tool | Primary Skill Improved | Price Range (USD) | Instant Feedback | Indoor/Outdoor | Best Beginner Use Case |
|---|---|---|---|---|---|
| Alignment Sticks | Setup & Alignment | $10–$20 | Visual | Both | Making sure your feet and clubface are aimed correctly |
| Grip Trainer | Hand Positioning | $15–$30 | Tactile | Both | Building a consistent, neutral grip from day one |
| Swing Tempo Trainer | Rhythm & Timing | $100–$150 | Audio/Data | Both | Slowing down a rushed transition at the top |
| Swing Plane Trainer | Swing Path | $100–$200 | Visual/3D | Both | Fixing an over-the-top move that causes slices |
| Impact Bag | Ball Striking | $25–$50 | Tactile/Visual | Both | Learning to hit the ball before the ground |
| Swing Analyzer App | Mechanics & Posture | Free–$50/month | Video | Both | Diagnosing swing flaws through slow-motion replay |
| Launch Monitor | Distance & Ball Flight | $200–$600 | Data/Voice | Both | Learning your true carry distance for each club |
Start by matching the tool to your most common miss. That makes the choice a lot simpler.
Alignment sticks and grip trainers are the lowest-cost, easiest tools to toss in your bag and use right away. Launch monitors give you the deepest level of feedback, but they cost a lot more. For example, the Rapsodo MLM2 Pro sells for about $500, while entry-level options like the PRGR begin closer to $200.
If your setup is off, begin with alignment sticks.
1. Alignment Sticks
Start with alignment sticks. Setup mistakes shape everything that happens later in the swing, so this is the first place to look. For beginners, alignment sticks create a simple ground line for stance, aim, and posture.
Primary Flaw It Fixes
They help keep your feet, hips, and shoulders parallel to the target line. A second stick can also show if you’re taking the club too far inside, coming over the top, or moving into early extension before impact.
Type of Feedback Provided
The stick gives you a plain target line you can check against. It also doubles as a reference point for video. For video, place one stick on the target line and set the camera at hand height.
Once your setup line looks the same from swing to swing, the next thing to check is hand position.
2. Grip Trainer
Once your setup is in place, the next thing to check is your grip. That’s the part that controls the clubface.
A grip trainer slides over the club handle and puts your hands where they should be. You feel right away if your placement is off, which takes a lot of the guesswork out of how to improve your golf game.
Primary Flaw It Fixes
Your grip has a direct effect on the clubface. If the grip is poor, the face often stays open, and that can lead to shaky contact. Wrist position matters too, since it plays a big part in clubface control and ball flight.
Type of Feedback Provided
Most grip trainers give tactile feedback. In plain English, they guide your hands into the right spot by feel. Some models also include sensor data, but the main draw is still the physical guide on the handle.
Practice Space Needed
Most grip trainers work fine indoors, even with air swings.
Once your hands are in the right spot, tempo is usually the next piece to clean up.
3. Swing Tempo Trainer
After grip and setup, tempo is the next piece that keeps the swing under control. A lot of beginners skip these golf tips. That’s a mistake, because a rushed move from the top can wreck contact and make the swing hard to repeat. A tempo trainer helps the backswing and downswing work together instead of fighting each other.
Primary Flaw It Fixes
The main issue here is a rushed transition. If you hurry from the backswing into the downswing, the club often gets thrown from the top. That can lead to a cast, and when that happens, you give up both power and consistency. Professional golfers usually stay near a 3:1 backswing-to-downswing ratio, while most amateurs are closer to 4:1 or slower.

Type of Feedback Provided
The feedback depends on the tool you use.
- Feel-based tools use a flexible or weighted shaft, which helps you sense the swing’s lag and rhythm.
- Sensor-based tools give you real-time audio cues and tempo ratio data through a smartphone app.
If you want something simple, go with a feel-based option. If you like numbers and instant feedback, a sensor-based tool makes more sense.
Practice Space Needed
One reason tempo trainers work so well is that they make timing easier to feel. Sensor-based tools often come with an air swing mode, so you can practice indoors without hitting a ball. Flexible-shaft and weighted versions need enough space for a full swing, so a backyard or driving range is usually the better spot. That makes tempo practice a lot easier to repeat, even when you don’t have time for a full range session. This is a great way to supplement your golf lessons between visits to the pro.
If tempo gets better but the club still moves off line, the next tool targets swing plane.
4. Swing Plane Trainer
Next up: club path. A swing plane trainer helps clean up an over-the-top move and keeps the club on plane.
Primary Flaw It Fixes
The main issue a swing plane trainer targets is the over-the-top move. That’s when the clubhead travels outside-in on the downswing, and it’s one of the big causes of slices. It can also help with steep angles of attack, inside drops, and shanks. The exact feedback you get depends on the tool you use.
Type of Feedback Provided
Different trainers show the path in different ways:
- Video apps show whether the shaft stays on plane.
- 3D sensors map the club path.
- Impact mats show the club path through the strike zone.
Practice Space Needed
You don’t always need much room. Apps and small sensors can work in a living room or garage. Some hybrid setups need about 15 feet of indoor space.
Price Range
Prices vary quite a bit:
- Entry-level mechanical trainers and impact mats: $40–$100
- Mid-range sensors: about $150
- Premium 3D systems and launch monitor hybrids: start around $400–$500
5. Impact Bag
If regular swing work still leads to weak contact, the next tool strips things down and lets you work on impact by itself.
An impact bag, sometimes called a smash bag, is a simple training aid for learning impact. You fill it with towels or clothes, place it on the ground, and swing into it. No screens. No numbers. No setup headaches. Just you and the bag.
Primary Flaw It Fixes
The impact bag helps fix casting, scooping, and slicing. The main lesson is forward shaft lean, so your hands stay ahead of the clubhead at impact.
Type of Feedback Provided
The feedback is tactile. You feel it in your hands and arms right away.
A solid strike feels heavy and centered. A bad strike feels weak and glancing. It’s simple, but that’s the point. The bag tells you fast whether you delivered the club in a strong position.
Practice Space Needed
A garage, basement, or backyard works well. You can use the bag for full swings indoors without a net, as long as you have enough ceiling clearance.
When it’s empty, the bag stays light and compact. One small warning: do not brace the bag with the strap, because it can tear under impact.
Typical Beginner Price Range
Most impact bags cost about $25 to $50.
If you want ball-flight data once impact starts to feel more solid, the next tool adds numbers to the picture.
6. Swing Analyzer App
Once feel-based drills start cleaning up your motion, video helps you see what’s actually happening.
A swing analyzer app turns your phone into a pocket-sized coach. You record your swing, then play it back frame by frame with drawing tools and measurement overlays.

Primary Flaw It Fixes
Swing analyzer apps work well for spotting swing plane problems, posture issues, and face-to-path mistakes. Apps like V1 Golf and Swing Profile can also help new golfers catch early extension. You can draw a reference line at hip height and see if a gap appears between your hips and that line at impact.
Some apps can also track tempo when you pair them with a sensor.
Type of Feedback Provided
The feedback here is visual. You watch your swing in slow motion, draw lines over the video to check plane, and compare your positions side by side with PGA Tour pros.
If you want more exact data, like wrist angles or tempo ratios, you can pair the app with a club-mounted sensor such as Blast Motion Golf.
Practice Space and Price
For video analysis, set your tripod 6 to 8 feet behind you at hand height. That setup gives you a clean down-the-line view. If you’re short on room, some apps offer an "Air Swing" mode so you can work on mechanics indoors without hitting a ball.
Many apps include free basic video analysis. Paid plans usually add more data and extra storage.
If video isn’t enough and you want straight ball-flight numbers, the next tool moves in that direction.
7. Launch Monitor
A launch monitor is the most data-heavy tool on this list. It tells you what happened after the swing by measuring things like ball speed, carry distance, and contact quality.
Primary Flaw It Fixes
Launch monitors take the guesswork out of distance. That matters more than most beginners think. Many new golfers overestimate carry by 10–15 yards, and that leads to bad club choices.
They also make poor contact hard to ignore. One of the clearest numbers here is smash factor, which is ball speed divided by club speed. If your driver smash factor is below 1.40, you’re usually not finding the center of the face.
Type of Feedback Provided
Entry-level units usually give you the basics:
- Club speed
- Ball speed
- Smash factor
- Carry distance
For most beginners, that’s plenty.
Mid-range models like the Garmin Approach R10 (~$500–$600) and Rapsodo MLM2 Pro (~$500) add launch angle, spin rate, and shot tracers. That’s useful, but there’s a catch: too much data can turn a practice session into a mess.
A better move is to watch just two or three metrics at a time, such as club speed, ball speed, and smash factor.
Practice Space Needed
Space needs depend on the unit. Radar models like the PRGR HS 130-A sit just inches behind the ball, so they don’t need much room.
Most other portable models need 6–8 feet behind the ball. If you’re hitting into an indoor net, plan for about 15 feet of total depth.
Typical Beginner Price Range
Most beginner launch monitors cost $200–$600, and many of the best portable options land around the $500 range.
The next step is picking the tool that lines up with your biggest swing flaw.
How To Pick the Right Swing Tool for Your Biggest Weakness
The fastest way to burn cash is buying a swing tool that doesn’t line up with your main miss. Before you spend a dollar, ask yourself one blunt question: Which mistake shows up the most? Start there. Not with the tool that looks fancy. Not with the one your buddy uses or what you see in golf articles. Go with the miss you see again and again.
Match the tool to the mistake you make most often
| Biggest Weakness | Best Tool Match |
|---|---|
| Poor alignment and stance | Alignment sticks |
| Weak grip or hand position | Grip trainer |
| Rushed transition or poor tempo | Swing tempo trainer |
| Over-the-top swing path | Swing plane trainer |
| Inconsistent contact | Impact bag |
| Need to see your swing clearly | Swing analyzer app |
| Need ball-flight and distance data | Launch monitor |
When you know the main problem, the tool choice gets pretty simple.

Decide between training aids and digital feedback tools
Physical training aids like alignment sticks, grip trainers, and impact bags help you build muscle memory through feel. They work almost anywhere and usually cost less.
Data tools like swing analyzer apps and launch monitors swap guesswork for numbers and video you can check.
If you practice at home or in a garage, physical aids usually make more sense. Launch monitors often need 6–8 feet behind the ball, so they’re a better fit for the range or a space set up for that kind of use.
Set a budget before you buy
| Budget Tier | Price Range | Tools |
|---|---|---|
| Low-cost basics | $10–$50 | Alignment sticks, grip trainer, impact bag |
| Mid-range feedback | $100–$200 | Swing tempo trainer, swing plane trainer |
| Higher-cost data tools | $200–$600 | Swing analyzer app, launch monitor |
The quick comparison at the top of this article already shows the exact price ranges for each tool. Use this budget guide to figure out where to begin. After that, keep your practice simple so the feedback stays easy to read.
How To Use Beginner Swing Tools Without Overcomplicating Practice
Work on one swing issue at a time
Once you’ve picked the right tool, keep your focus narrow. Start with one swing fault, not three. Choose the miss or movement that shows up most often, then spend that practice block working on that alone.
Trying to fix everything at once usually turns practice into a mess. One clear target gives you a better shot at feeling what changed.
Use short sessions and slow reps
More swings don’t always lead to more progress. A small number of focused reps, done with full attention, can do more than pounding through a big bucket with no clear purpose.
Slow the motion down. Pay attention to what the tool is telling you. Repeat the move until it starts to feel normal, then add speed. Those slow, controlled reps help you find the right swing tempo before you try to swing at full pace.
Mix drills with normal swings
Drills teach the move. Normal swings show whether it sticks.
After your slow reps, test that same move with regular swings. Do a few guided reps with the tool, set it aside, and then hit a few normal shots. That simple back-and-forth keeps the change from vanishing the second you make a full swing.
If the move falls apart during regular shots, that’s a sign to slow things down again and rebuild the feel.
Use instruction only when the feedback is unclear
When the tool gives clear feedback but the fix still feels fuzzy, use a simple drill plan to connect the dots. How To Break 80‘s drills and video courses can help turn that feedback into a practice plan you can actually follow.
Conclusion
For most beginners, the best swing tool is the one that makes your biggest flaw easy to spot and simple to work on again and again. That’s why a basic tool is often the best place to start.
If your slice is tied to poor clubface control, begin with a grip trainer or a swing analyzer app, not a launch monitor. Start with one or two simple aids, learn how to use them, and build from there.
More data only helps when you use it.
If you want help turning that feedback into practice, How To Break 80 offers drills and video courses built around the same fundamentals.
FAQs
Which swing tool should I buy first?
Your first swing tool should match the kind of feedback you want.
For most beginners, a camera-based app is the easiest and lowest-cost place to start. A free app like Swing Profile lets you record your swing, check your swing plane, and use slow motion to catch basic posture or alignment issues.
If you want hard numbers, the PRGR Black gives you instant swing speed and carry distance. If you’re more focused on tempo and rhythm, Blast Golf is a strong sensor-based option for someone just getting started.
Can I use these tools at home?
Yes. A lot of swing analyzers and golf apps are made for home use, so you can practice in your living room, garage, or backyard.

You may not even need real golf balls. Many sensor-based tools and camera apps work with air swings, foam balls, or wiffle balls. That makes it easier to check things like tempo, swing speed, and swing mechanics without heading to the course.
Do beginners need a launch monitor?
Not always. A lot of beginners are better off putting their money into lessons first so they can build a sound swing. Too much data, too soon, can pull attention away from proper technique.
That said, if you want objective feedback, a simple and easy-to-use launch monitor can still help. Just keep it basic. Focus on metrics like swing speed, ball speed, and carry distance. Leave the more advanced numbers for later, once your fundamentals are in better shape.
Related Blog Posts
- Ultimate Guide to Using Alignment Sticks
- Wearable Swing Analyzers: Are They Worth It?
- Top 5 Drills Using Alignment Sticks
- Best Virtual Tools for Swing Practice Routines
