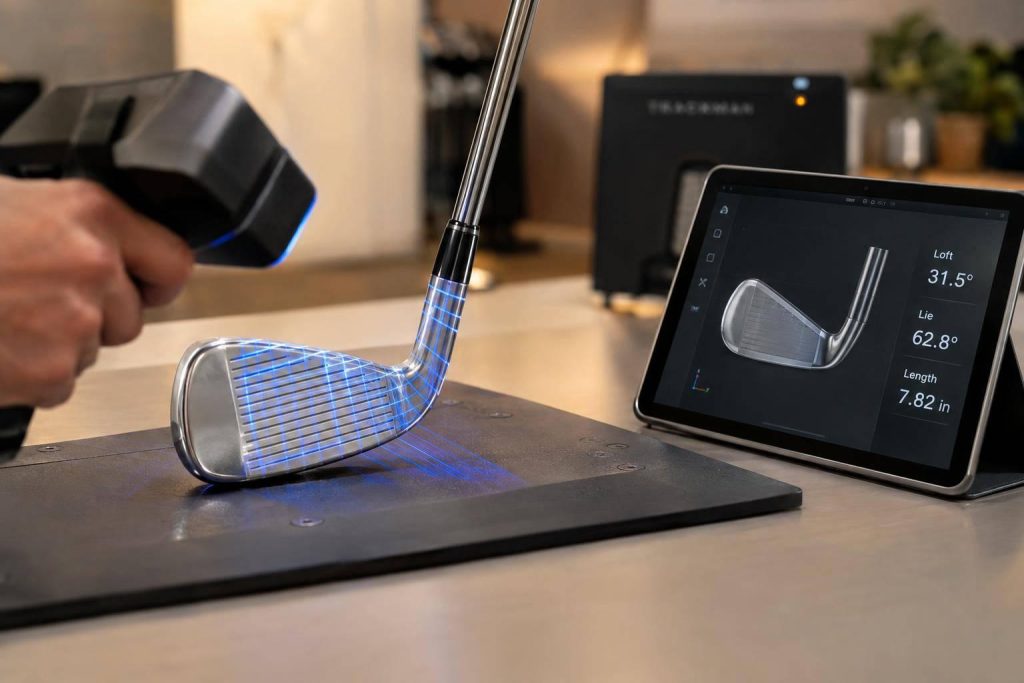
I’d use 3D scanning to check club specs – not to predict better shots. Before testing, ask your fitter to verify loft, lie, and length, then compare those measurements with your swing and ball-flight data.
Here’s the process I’d follow:
- Scan and measure: Calibrate the scanner, prepare the club, and check the model’s scale and reference points.
- Test the fit: Use repeated shots to compare strike location, launch, spin, carry, and dispersion – not just one good swing.
- Verify and save: Recheck specs after adjustments and save the scan, build sheet, and shot results for future repairs or rebuilds.
<u>A surface scan cannot measure shaft flex, internal weighting, total weight, or swing weight.</u> Those need separate checks. My takeaway: pair verified geometry with real-shot testing, then keep practicing the swing skills equipment can’t fix.
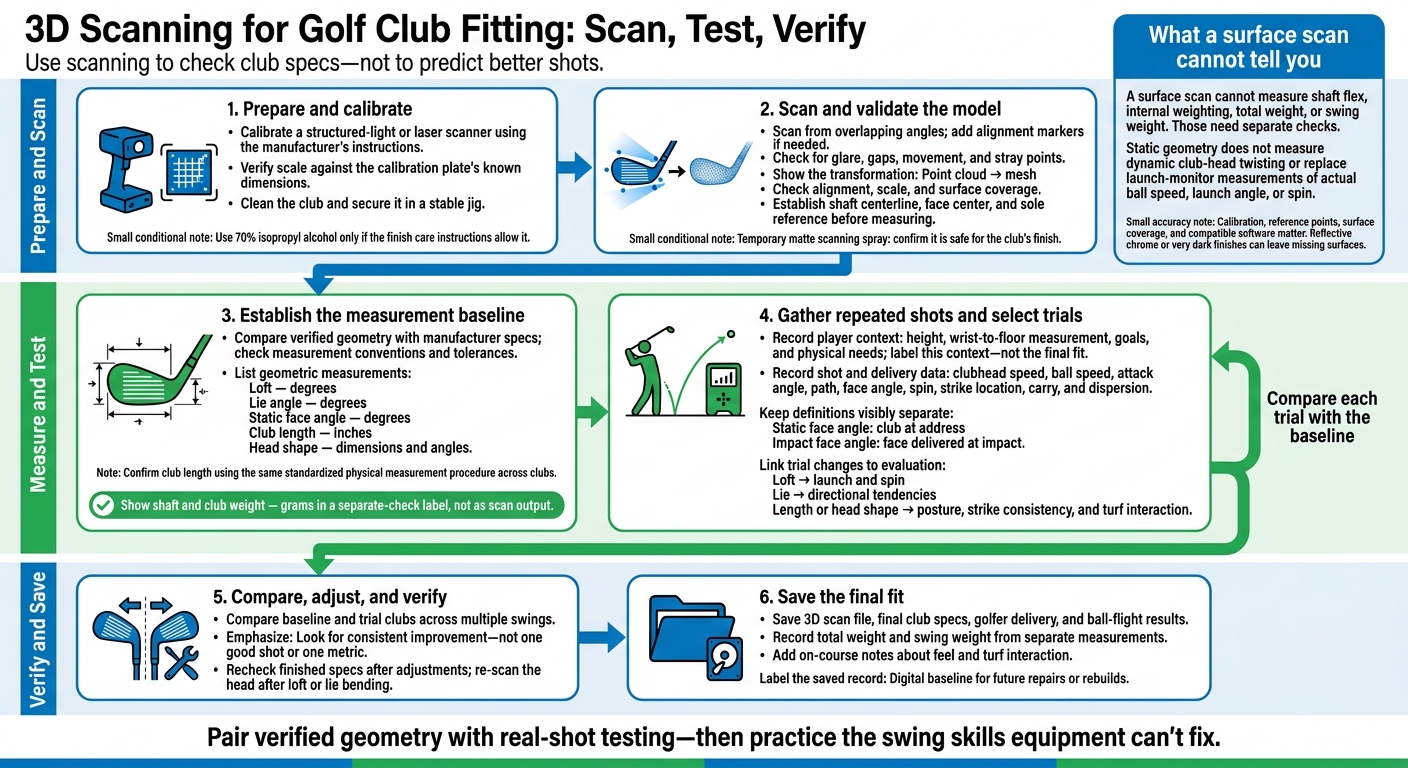
3D Scanning for Golf Club Fitting: Scan, Test, Verify
Step 1: Prepare and Scan the Club
Record Club Specs and Calibrate the Scanner
Start with a calibrated structured-light or laser scanner, a calibration plate, and a stable jig to hold the club. Follow the manufacturer’s calibration steps, then verify the scan’s scale against the plate’s known dimensions. This check makes the scan useful for club-spec measurements, not just visualization.
Clean the club with a microfiber cloth. Use 70% isopropyl alcohol only if the finish care instructions allow it. Secure the club in the jig so it won’t move during the scan and affect dimension checks.
Scan the Club Surfaces
Scan from overlapping angles so the software can merge the data into a complete surface. Add alignment markers if needed. Watch for glare, gaps, and movement – each can disrupt alignment and throw off club measurements.
For reflective or dark surfaces, a temporary matte scanning spray can help the scanner collect measurable surface data. Check the product directions and confirm that it’s safe for the club’s finish before applying it.
Build and Check the 3D Model
A point cloud is the raw scan data that software converts into a mesh. Merge the scans using overlapping areas or alignment markers. Then check alignment, scale, and surface coverage, using the calibration plate to verify scale and support consistent build checks.
Before taking measurements, establish the shaft centerline, face center, and sole reference. Inspect the model for gaps and stray points.
Use the verified model as the baseline for measuring loft, lie, length, and head shape in the next step, where the fitter compares those measurements against swing data. For more advice on improving your game, explore our golf tips.
sbb-itb-bcd8bdd
Step 2: Measure the Club and Gather Swing Data
Measure Loft, Lie, Length, and Head Shape
Compare the verified scan with the manufacturer’s specs. Before treating a difference as a fitting issue, check the measurement convention and tolerance.
| Specification | Unit | Reference point | Fitting relevance |
|---|---|---|---|
| Loft | Degrees | Face plane relative to the shaft axis, using the documented loft convention | Helps evaluate launch and spin |
| Lie angle | Degrees | Shaft centerline relative to the ground reference | Helps evaluate horizontal start direction |
| Static face angle | Degrees | Face orientation relative to the target line in a defined address position | Records whether the resting face points open, square, or closed |
| Club length | Inches | Standardized procedure, such as the applicable USGA method | Helps assess posture and strike consistency |
| Head shape | Dimensions and angles | Face height, width, curvature, sole contours, and bounce | Helps compare contact surfaces and turf interaction |
| Shaft and club weight | Grams | Manufacturer data or a physical weigh-in | Helps assess tempo, timing, and speed |
Use the same physical measurement procedure to confirm length across all clubs. These measurements form the baseline for your swing data.
Connect Club Measurements to the Golfer’s Swing
Static specs tell only part of the story. How the club performs in motion matters.
Record the golfer’s height, wrist-to-floor measurement, goals, and physical needs. Treat these as context – not the final fit. Combine player data with the verified scan, club delivery, and ball-flight data to build a clearer fitting baseline.
Gather repeatable shots and record clubhead speed, ball speed, attack angle, path, face angle, spin, strike location, carry, and dispersion. Keep the two face-angle measurements separate: static face angle describes the club at address, while impact face angle describes the face delivered at impact.
Set fitting priorities based on repeatable strike and ball-flight patterns, not body measurements alone.
Select Club Specs to Test
Use the baseline to compare the club’s current geometry with proposed specs or candidate clubs. Test loft changes against launch and spin, and lie changes against directional tendencies. Check length or head-shape changes against posture, strike consistency, and turf interaction.
Compare each trial with the baseline before deciding whether the change improved the fit.
Step 3: Test Changes and Document the Final Fit
Test Adjustments and Verify Club Specs
Compare the baseline and adjusted clubs across multiple swings. Use ball flight, delivery, club specs, and player data to check whether the adjustment improved the fit. Look for consistent improvement, rather than relying on one shot or metric, to shoot like the pros.
After making adjustments, scan the club to verify its finished specs. If you bent the club for loft or lie, re-scan the head to confirm it meets the target spec.

Once you’ve confirmed the target specs, document the build.
Save the Final Build Sheet
Save the 3D scan file along with the final club specs, golfer delivery, and ball-flight results. This creates a digital baseline for future repairs or rebuilds.
Record total weight and swing weight from separate measurements. A surface scan cannot determine either.
Understand Scanning’s Benefits and Limits
| Aspect | Benefit | Limitation |
|---|---|---|
| Repeatable geometry measurements | Records loft, lie, and head shape | Provides static data only; cannot measure dynamic club-head twisting during the swing |
| Digital comparisons | Shows offset and shape differences through model overlays | Requires compatible software and file formats |
| Specification tracking | Keeps a before-and-after record of club specs | Accuracy depends on proper sensor calibration before scanning |
| Surface capture | Records complex face textures and grooves that affect spin | Highly reflective chrome or very dark finishes can leave blind spots or missing surfaces |
| Launch-monitor validation | Provides a clearer baseline for comparison with performance data | Cannot replace launch monitors for measuring actual ball speed, launch angle, or spin |
Add on-course notes about feel and turf interaction to the build sheet. Use the verified scan to confirm specs, then check performance with real swings on a launch monitor.
Golf Club Inspection with Multi-Sensor 3D Stitching & 6 DoF Alignment | Gocator 2600 Series
Conclusion: Pair Verified Club Specs With Practice
After the final scan and test swings, confirm that the scan data matches the ball-flight and delivery data before accepting the fit. Check the saved build sheet for the final loft, lie, and head-shape measurements.
Ask your fitter which changes came from scanning and which came from launch-monitor results. Then focus your practice on what the club fit can’t fix.
How To Break 80’s practice resources can help you work on swing, driving, and putting issues that equipment changes can’t solve.
FAQs
How accurate should a club scan be?
The accuracy you need depends on your goals. Professional-grade optical systems are the gold standard, detecting shaft deflection with precision down to 0.2 mm (about 0.008 inches). Wearable inertial sensors often measure rotation within 2 degrees of lab-grade systems, but they can drift 12–24 inches during fast movements.
The data should help you understand why your swing misses. Track performance trends over time rather than chasing a single perfect measurement.
How many shots should I hit during fitting?
For reliable club-fitting data, aim for at least 30 shots per club. In some cases, 20 to 30 shots may be enough to spot performance patterns and make informed decisions.
Start with 10 to 12 consistent shots per club to set a baseline. These should reflect your typical performance, not just your best swings.
When should I have my clubs rescanned?
Consider having your clubs rescanned or getting a new fitting if you want a more detailed swing evaluation or tighter shot dispersion. If you’ve been fitted before, another fitting can turn your existing measurements into updated club specifications as your game changes.
Occasional professional optical scanning sessions can support regular practice and help keep your equipment matched to your current physical abilities and swing patterns [3].
Related Blog Posts
- Top AI Tools for Custom Golf Club Fitting
- Checklist for AI Club Fitting Success
- How Machine Learning Improves Club Fitting
- How Data Integration Improves Club Fitting Accuracy
