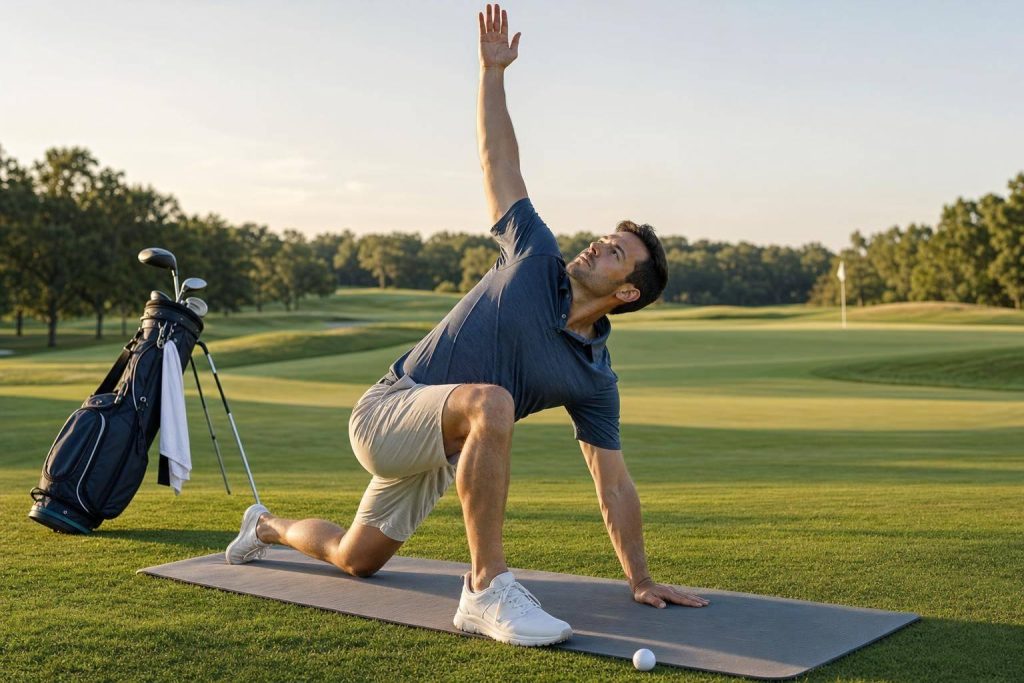
If your golf swing feels tight, off-balance, or hard on your low back, yoga can help. I’d keep it simple: do 10 to 15 minutes before a round, add 2 to 3 short sessions a week, and give it 4 to 8 weeks to notice changes in rotation, balance, and control.
Here’s the short version:
- Yoga helps golfers move better through the hips, upper back, shoulders, and ankles
- It can support a steadier swing by training balance, glute strength, and core control
- It can help with common sore spots like the low back, hips, and shoulders
- Breathing work matters too, especially when nerves show up on the first tee
- Short sessions work: even 15 minutes, 2 to 3 times per week can make a difference
- Before golf, use dynamic moves, not long static holds
- After golf, use slow recovery poses for 30 to 60 seconds each
A simple golf yoga plan usually has 3 parts:
- Warm up before play with Cat-Cow, hip openers, thoracic rotations, Bird Dog, and Chair Pose
- Train at home during the week with mobility work for hips and spine, plus strength work for glutes and core
- Recover after practice or a round with Child’s Pose, Figure-Four, spinal twists, and Legs on a Chair
What matters most is not doing more. It’s doing the right poses on a steady schedule, staying in a pain-free range, and using yoga to help your swing – not tire you out before you play.
Below, I’ll walk through how yoga fits each part of the swing, which poses help most, and how to build a short routine that fits normal life.
How Yoga Improves the Golf Swing
Physical Demands by Swing Phase
Yoga helps with the exact weak spots that tend to show up in a golf swing: mobility, stability, and breath control.
During the backswing, your thoracic spine needs to rotate well, your hips need to load without caving in, and your shoulders need to get to the top of the swing without your lower back trying to do extra work.
The downswing relies on timing, core stability, and ankle dorsiflexion. If the ankles don’t move enough, the hips can drift toward the ball too early. That’s called early extension, and it throws off impact position.
At impact, the glutes need to produce force while also helping protect the lower back. As Antonia Nugent, CSCS and Movement Specialist, puts it:
"Having strong glutes brings more power to your swing and helps take pressure off your lower back during the downswing when your clubhead connects with the ball."
The follow-through calls for hip flexor length and thoracic extension so the body can slow down smoothly and finish in balance.
This is where many golfers run into trouble. They lose mobility, stability, or balance at one point in the swing, and the rest of the motion starts to unravel.
Where Golfers Are Most Often Restricted
Most amateur golfers tend to deal with the same few limits: tight hip flexors, limited thoracic rotation, rounded shoulders, and poor ankle dorsiflexion. A lot of that comes from long hours sitting, whether at a desk or behind the wheel. On the course, those limits often show up as shorter turns, weaker contact, and less balance.
Dana Santas, Mind-Body Coach, explains the chain reaction well:
"Because golf swings require powerful mobility through an enormous range in the hips and thoracic spine, any limitations in these areas will put undue compensatory stress on other areas of the body, like the low back."
Breathing mechanics matter too. They affect rib position, core tension, and hip stiffness. That’s why breath work should be part of golf mobility training, not treated like an extra.
Next, use poses that open up these limits while keeping control, which is a key part of learning how to quickly improve your golf game.
Swing Phase and Yoga Focus Table
| Swing Phase | Key Physical Requirements | Representative Yoga Focus |
|---|---|---|
| Backswing | Thoracic rotation, hip internal/external rotation, shoulder range | T-spine mobility, hip-to-torso separation |
| Downswing | Sequencing, ankle dorsiflexion, core stability | Ankle mobility, rotational stability |
| Impact | Glute activation, pelvic stability, single-leg balance | Glute strength, isometric core control |
| Follow-Through | Hip extension, T-spine rotation, deceleration control | Hip flexor flexibility, spinal twists |
| General Play | Posture and rhythm, mental focus | Diaphragmatic breathing, core control |
Next: the poses that match each phase.
sbb-itb-bcd8bdd
Best Yoga Poses for Golfers
Mobility Poses for Hips, Spine, and Shoulders
These poses help you build the kind of movement a golf swing asks for, from setup to follow-through.
Low Lunge opens the hip flexors, which can help you turn more fully without dumping stress into the lower back. Figure-Four eases tension in the outer hips and glutes, two spots that often get tight from long walks and repeated rotation. If your knees get cranky, the reclined version is the better pick.
Cat-Cow keeps the spine moving and can take the edge off stiffness. Thread the Needle helps you get more rotation through the upper back and rear shoulder, which can make the backswing feel less restricted. Supine Spinal Twist gives the spine a gentle release after all that repeated turning. Downward Facing Dog stretches the hamstrings, calves, and shoulders, so you get a strong posterior-chain stretch in one position.
Once those areas start moving better, the next step is control.

Strength and Balance Poses for a More Repeatable Swing
Mobility on its own isn’t enough. You also need the strength and balance to hold those positions during the swing.
Chair Pose works the quads, glutes, and core at the same time. That makes it a close match for the athletic setup position at address. Warrior II builds lower-body control, which matters when swing speed tries to pull you out of position.
Bridge Pose is one of the best glute builders for golfers. It gets the glutes firing to help drive the downswing while taking pressure off the lower back. Boat Pose trains the obliques and deep core to resist rotation. That anti-rotation control can help limit early extension. Bird Dog builds cross-body coordination from a stable base, and that carries over well to downswing sequencing. Tree Pose makes side-to-side differences easier to spot, while Warrior III takes single-leg balance up a notch.
After that kind of loading, it makes sense to shift into recovery work.
Recovery Poses for After Practice or a Round
Use these poses after practice or after a round. Hold each one for 30 to 60 seconds so your breathing can slow down and tight muscles can start to let go.
Child’s Pose decompresses the lower back, opens the shoulders, and helps settle the breath. If you turn the palms up, you also add a light external shoulder rotation. Supine Spinal Twist works well next, since it helps release the spine after hours of repeated rotation.
For the hips, reclined Figure-Four is easier on the knees than Pigeon and helps relieve tightness after a long walk. Downward Facing Dog stretches the hamstrings, calves, and shoulders after a day on the course. If you’re older or dealing with stiffness, props like blocks, a folded towel, or a chair can make each pose safer and easier to do well, much like adapting golf lessons to your physical needs. A simple way to finish: put your legs on a chair for 2 minutes.
| Pose | Primary Region | Golf-Specific Benefit |
|---|---|---|
| Low Lunge | Hips | Opens hip flexors for fuller rotation and less lower-back compensation |
| Figure-Four (Reclined) | Hips / Glutes | Relieves outer hip tightness and is gentler on the knees |
| Cat-Cow | Spine / Shoulders | Loosens the back and helps maintain posture |
| Thread the Needle | Shoulders / Thoracic Spine | Releases the rear shoulder and upper back for better backswing rotation |
| Supine Spinal Twist | Lower Back / Hips | Gently releases the spine after repetitive rotation |
| Downward Facing Dog | Shoulders / Hamstrings | Improves shoulder range of motion and stretches the posterior chain |
| Chair Pose | Legs / Hips / Core | Builds a steady lower-body base for balance through impact |
| Warrior II | Hips / Thighs | Mimics the wide, controlled address stance and improves hip stability |
| Bridge Pose | Glutes / Lower Back | Strengthens glutes to power the swing and protect the spine |
| Boat Pose | Core / Obliques | Improves rotational stability and trunk control |
| Bird Dog | Core / Spine | Enhances cross-body coordination and stability |
| Tree Pose | Feet / Ankles / Core | Improves stability for uneven lies and reveals imbalances |
| Warrior III | Legs / Proprioception | Increases single-leg stability and balance control |
| Child’s Pose | Lower Back / Shoulders | Releases tension and helps slow the breath |
| Legs on Chair | Lower Back / Legs | Provides passive recovery after a long day of play |
Yoga for Golf | Improve Your Swing, Strengthen Your Lower Back, and Increase Flexibility for Golf!
How to Build a Golf-Specific Yoga Routine
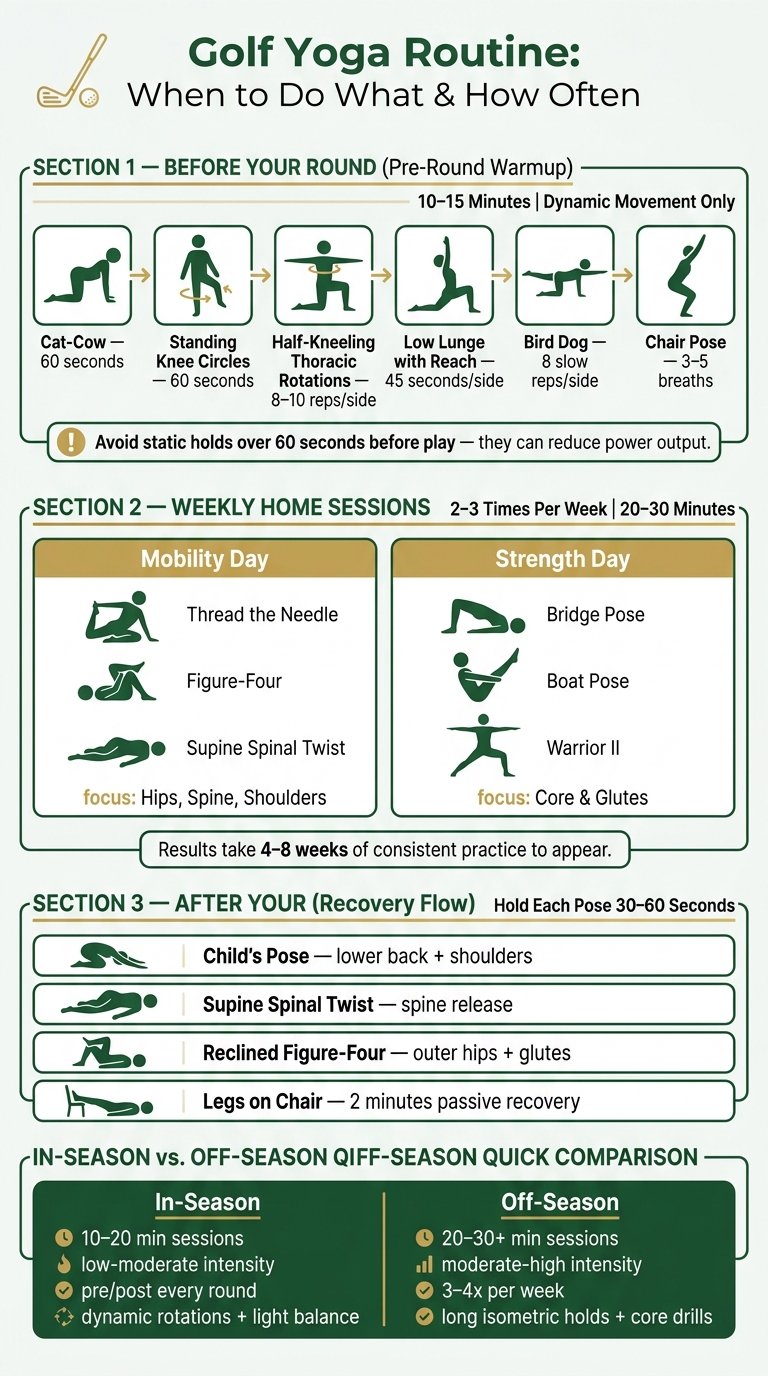
Golf Yoga Routine: When to Do What & How Often
Once you know which poses help, the next step is turning them into a simple schedule.
10-15 Minute Warmup for the Range or First Tee
Before a round, the goal isn’t deep stretching. It’s getting your body online. Dynamic movement works better than long static holds here. Static stretches held for 60 seconds or more right before play can temporarily reduce muscular power output.
A solid pre-round sequence fits into a 10- to 15-minute window. Start with Cat-Cow for 60 seconds. Then move into dynamic hip openers with standing knee circles for 60 seconds, Half-Kneeling Thoracic Rotations for 8 to 10 reps per side, Low Lunge with a reach for 45 seconds per side, Bird Dog for 8 slow reps per side, and Chair Pose for 3 to 5 breaths.
That sequence is meant to wake up the core and glutes, loosen the hips and thoracic spine, and help you avoid showing up to the first tee already tired.
For longer-term progress, pair this warmup with two or three short sessions each week.
20-30 Minute Home Sessions and Seasonal Planning
Two to three sessions per week is enough. In fact, 15 minutes done 2 to 3 times a week works better for lasting results than one longer session once a week. Changes in mobility and balance usually take 4 to 8 weeks of steady practice to show up.
A simple setup is to alternate between:
- a mobility-focused day for the hips, spine, and shoulders, using poses like Thread the Needle, Figure-Four, and Supine Spinal Twist
- a strength-focused day for the core and glutes, using Bridge Pose, Boat Pose, and Warrior II
How those sessions look should shift with the season:
| Feature | In-Season Focus | Off-Season Focus |
|---|---|---|
| Primary Goal | Maintenance, mobility, and post-round recovery | Building usable strength, core control, and full range of motion |
| Session Length | 10–15 min (pre-round); 15–20 min (recovery) | 20–30+ min |
| Intensity | Low to moderate; avoid fatigue before play | Moderate to high; focus on long holds |
| Frequency | Pre/post every round | 3–4 times per week |
| Key Movements | Dynamic rotations and light balance | Long isometric holds (Warrior II, Chair) and core drills |
That plan only works if yoga fits around your golf work, not piled on top of it.
Fitting Yoga Around Practice, Gym Work, and golf strategy
Yoga should support your golf work, not compete with it. Put harder sessions on days away from the range or gym. After play, use slower recovery work. Save longer sessions for off-days.
For most golfers, the weekly rhythm is pretty simple: dynamic warmup before range sessions and rounds, one or two 20- to 30-minute mobility or strength sessions on off-days, and a short recovery flow after play. With steady practice, mobility and core stability can improve, which makes swing drills and speed training easier to do with good form.
Breathing, Safety, and Key Takeaways
Breathing and Focus on the Course
Once you’ve got some mobility work in place, breathing is the easiest reset you can use on the course.
A lot of golfers start breathing in a tight, shallow way when pressure kicks in. That’s where slow nasal breathing can help. It settles your stress response and helps you get back under control. As Dana Santas puts it:

"Too often, golfers inadvertently let shallow breathing push them into fight-or-flight mode, making them feel anxious and out of control."
Slow nasal breathing can lower stress hormones, heart rate, and blood pressure. A simple pattern is a 5-second inhale, a 7-second exhale, and a 3-second pause for about 90 seconds. You can do it on the tee box, next to the green, or while sitting in the cart.
Common Mistakes and Smart Modifications
Safety comes back to one rule: stay in a pain-free range.
The most common mistake is trying to force deep stretches before your tissues are warm. That usually backfires. Build into the work bit by bit over weeks to months, not all at once. If a pose brings on sharp pain, pain that travels down a leg, or pain that sticks around after the stretch, stop right away.
Props can help you stay steady and keep positions pain-free. And when you rotate, turn through your upper back rather than your low back.
Conclusion: Start Small and Use Yoga to Support Better Golf
Keep it short, repeatable, and pain-free.
Yoga tends to help most when it goes after the limits that make a golf swing harder to repeat, like tight hips, a stiff thoracic spine, and poor balance. More isn’t always better here. Doing the work 2 to 3 times per week matters more than cramming in extra sessions, and it can take 4 to 8 weeks before you notice changes in mobility or balance.
How To Break 80 offers practical drills and swing guides to help you bring that movement onto the course.
FAQs
Can beginners do golf yoga?
Yes. Yoga is a smart choice for golfers at any level, including beginners. It can build the mobility, stability, and core strength that support a more steady golf swing.
If you’re just starting out, keep it simple. Aim for two to three sessions a week and spend extra time on the hips and thoracic spine. You don’t need to nail every pose right away. In golf, like almost anything else, steady practice matters more than extreme flexibility.
Should I do yoga on the same day I play golf?
Yes – if you choose the right intensity and timing. A short, gentle routine before your round can loosen muscles, help rotation, and get your body ready for the swing.
After your round, a slower session focused on recovery can help ease stiffness and support flexibility.
What if a pose hurts my back or knees?
If a pose hurts your back or knees, ease out of it right away or change the move. Less is more. Don’t push into pain.
With stretches like the figure-four, avoid yanking so hard that your knee starts to protest. And if you can’t quite get into a position, like reaching your calf during a rotation, that’s okay – go only as far as feels comfortable.
Related Blog Posts
- 10 Pre-Round Warm-Up Exercises for Better Golf Performance
- 5 Stretches After Golf for Faster Recovery
- Full-Body Stretching Routine for Golfers
- Pre-Round Mobility Checklist for Golfers
